Due October 4th, 2021 at 11:59 PM.
Before you start, make sure you have followed the Setup Instructions. You will need to have VSCode, Docker and Git installed in order to complete this project. The following topics are covered on this page:
- Getting the code
- Submitting your assignment
- Running a Docker container
- Project description
- Feature Summary
Getting the code
We will use GitHub Classroom to manage assignments. The invite link to accept the assignment on Github Classroom can be found on Slack.
You will see a page that looks like this (make sure you are signed in to your account on github.com):
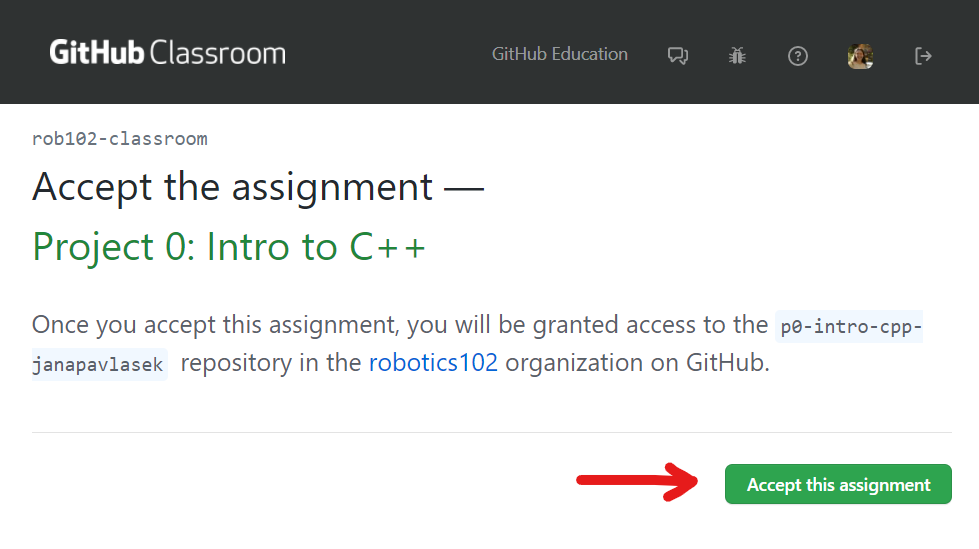
Click Accept this assignment. You will see a page like this, telling you the repository is being created:
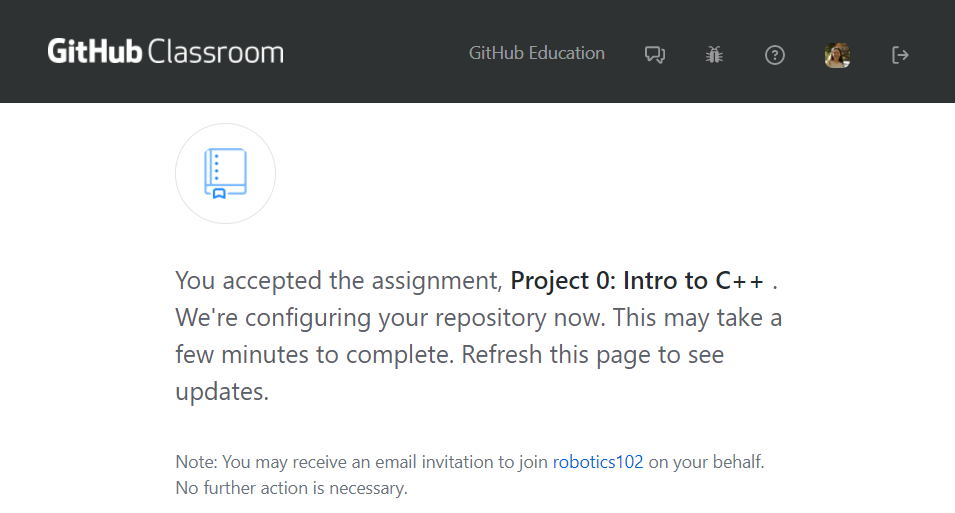
Wait a few seconds, then click refresh. You should see a link to your repository. Note that you can also find your repository by going to the repositories page on the ROB 102 GitHub and looking for a repository named p0-intro-cpp-[your-user] (with your username instead of [your-user]).
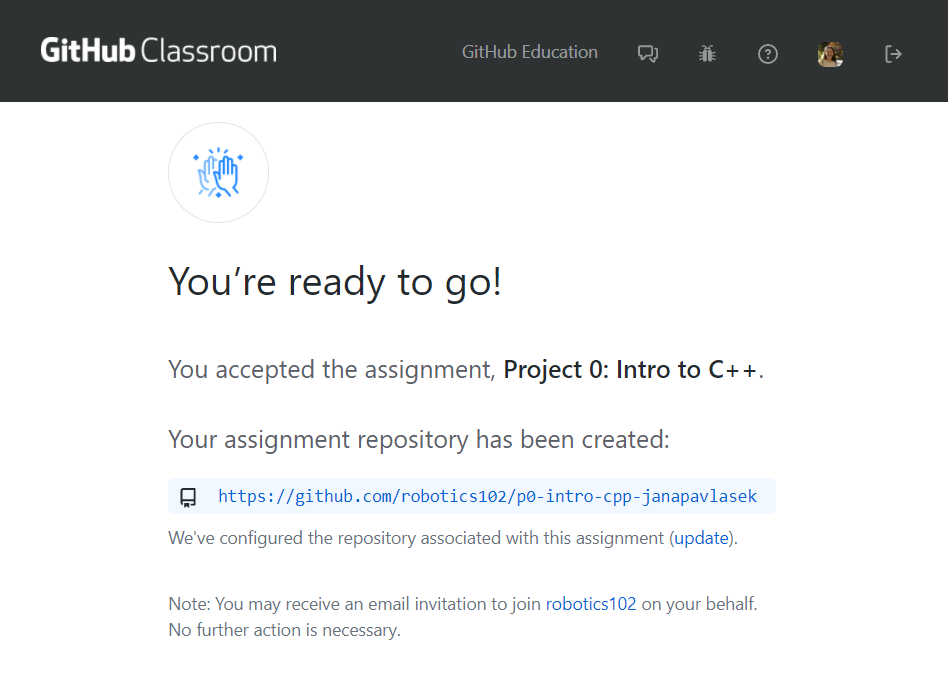
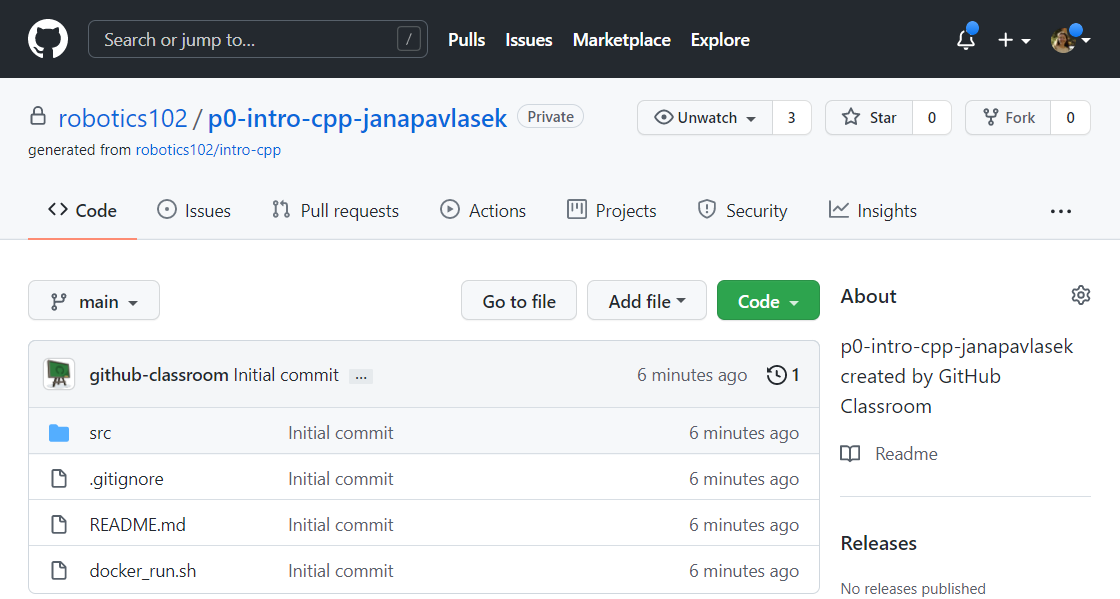
Click the link to navigate to your repository on GitHub. You should see a repository with the template code, which looks something like this:
Cloning the Repository
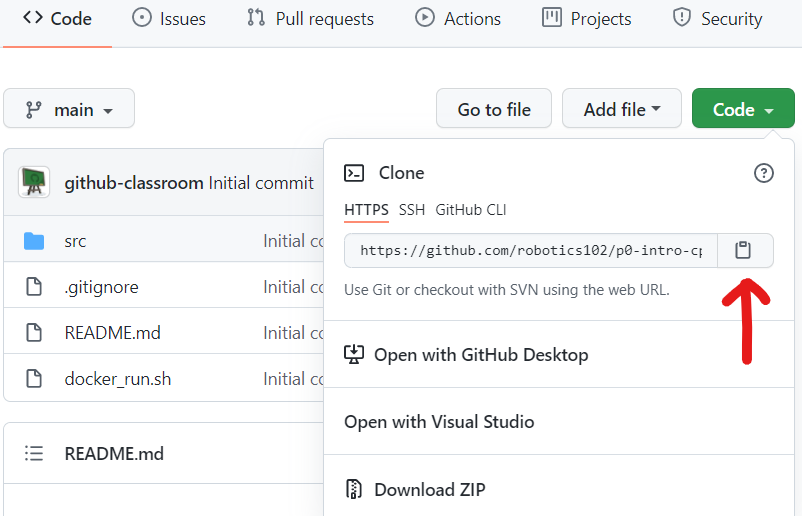
You will now clone the repository you just created onto your computer. On the repository page, click on the green button that says "Code" and select the clipboard icon to copy the link to the repository:
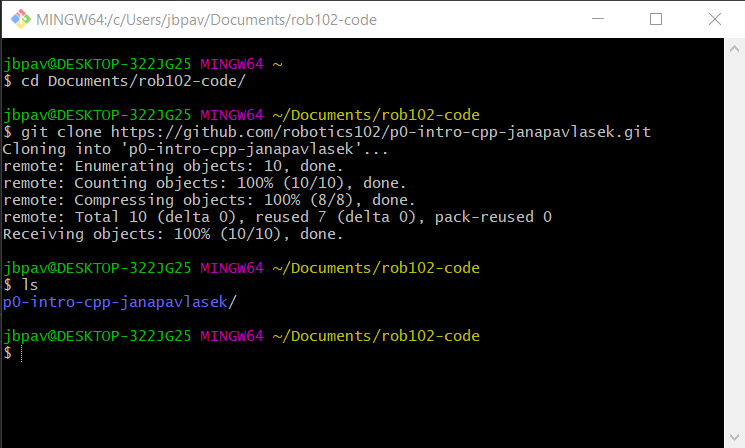
Open a terminal (in Windows, open Git Bash). Navigate to the folder where you want to store the code for this course with the command cd. For example, you might create a folder called "rob102-code". Make sure to take note of where you are storing the code so you can find it later! After this folder is created, in the terminal, type:
cd Documents/rob102-codeYou will now be in a terminal inside the folder you just created. Now, in the same terminal, type the following command to clone your repository:
git clone <ADDRESS>Substitute the address to your repository, which you just copied. The first time you use Git, a window should appear asking you to log in. Click the option to log in from your browser and enter your username and password. When you're done, the repository should clone from your terminal. If you type ls into your terminal, you will see the folder containing the code you just cloned.
Once you have the code on your computer, open VSCode and select "File" > "Open Folder..." (just "Open..." on Mac) and navigate to where you stored your code. Select the folder and click "Select Folder". Now you should see all the files in VSCode in the file explorer on the left. You can click on any file to view and edit it.
Submitting your assignment
You will submit your assignment by committing your code to your GitHub repository on the main branch. The instructors have access to the repository and they will pull and run your code.
You will indicate which version of the code you want graded through a Git feature called tagging. Once your code is ready to go, you can tag the current version by typing the following command in a terminal, from inside the repository directory:
git tag p0-v1You can look at the tag and check that your most recent code is included with the following command:
git show p0-v1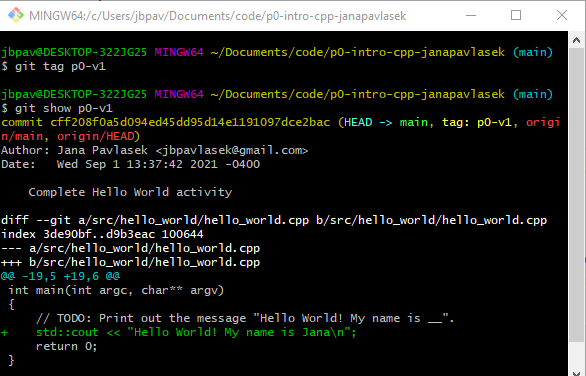
Finally, push your tag to GitHub:
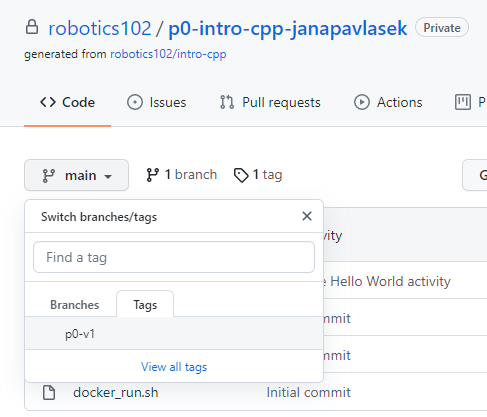
git push origin p0-v1Make sure your tag was pushed correctly. You can do this by navigating to the repository in your browser and clicking on the tag icon:
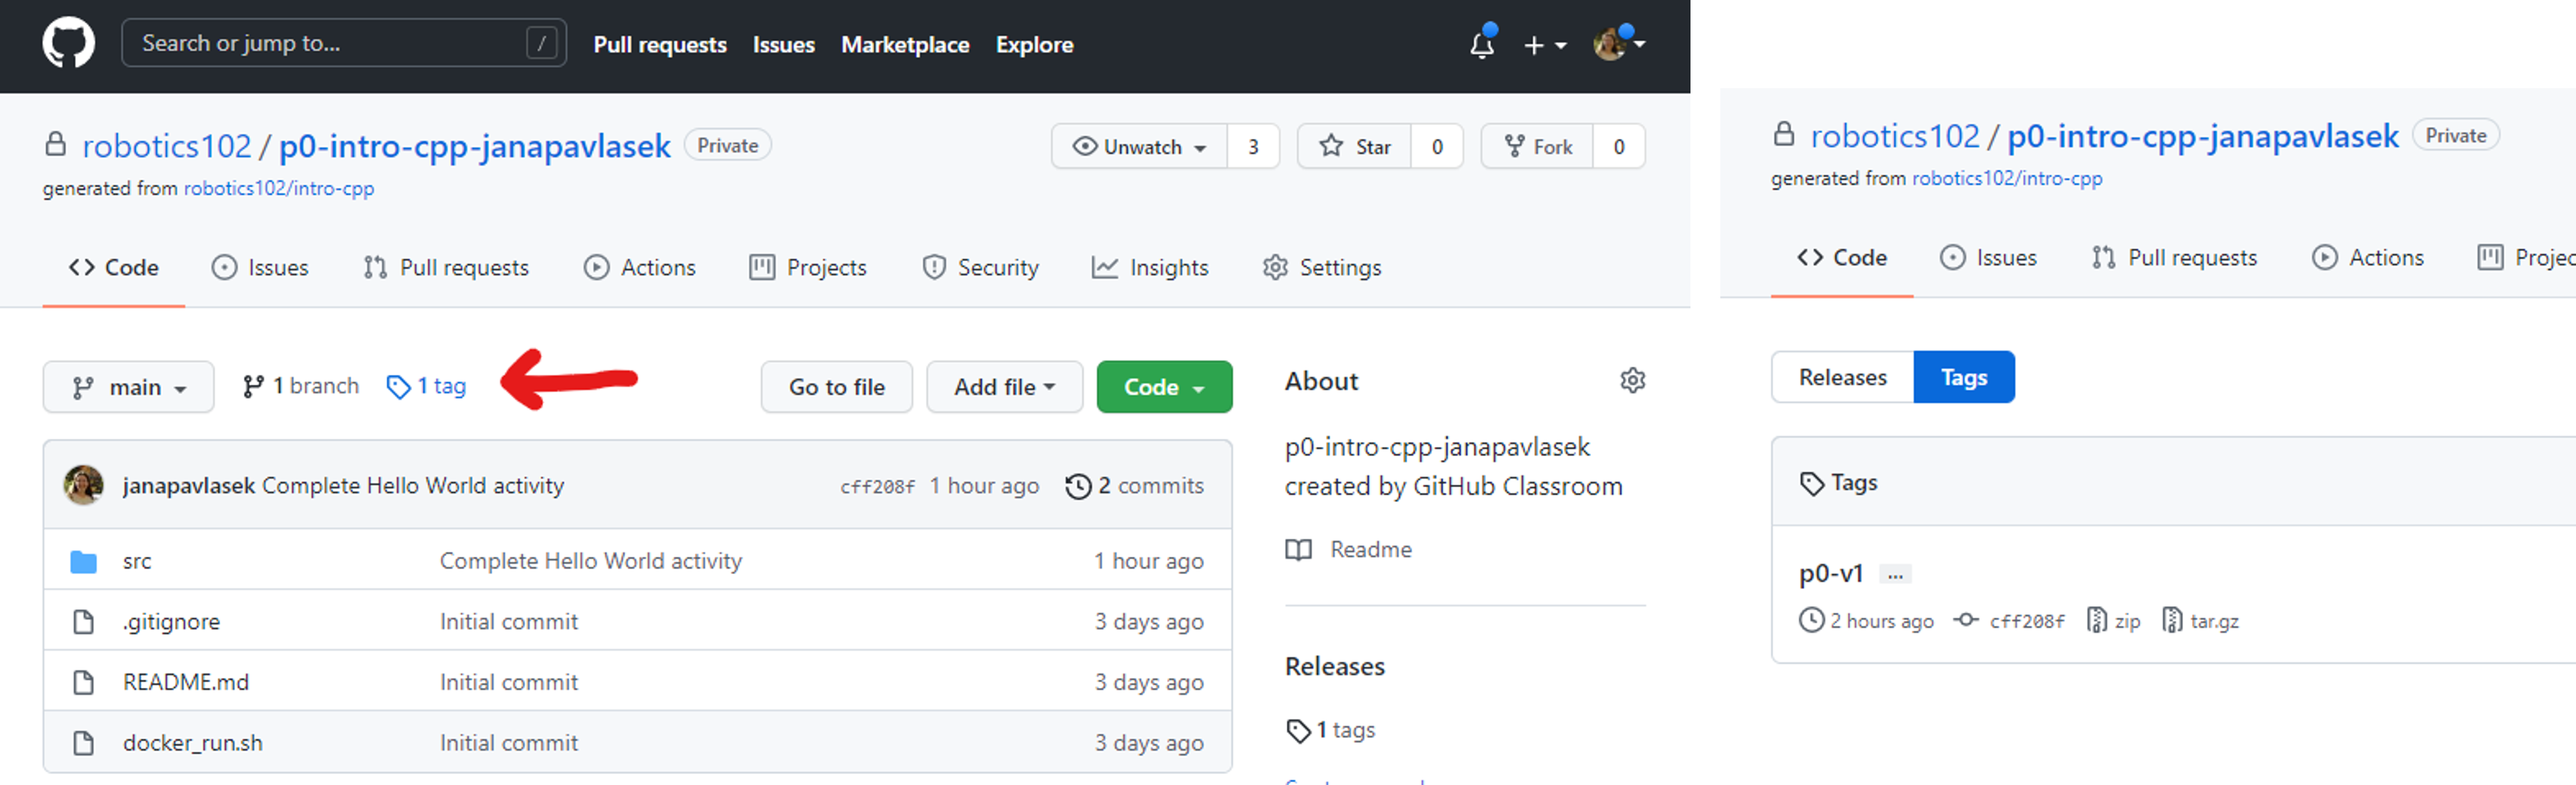
You can also view the code associated with the tag by selecting it from the "Code" tab of the repository:
Updating your submission
If you want to change your submission before the deadline, simply add a new tag and increment the version number. For example, if you want to submit a second time, tag your new commit with tag p0-v2.
Running a Docker container
For this assignment (as well as Project 2 and Project 3), you will be compiling and executing your code in a Docker container. A Docker container provides a virtual environment with all the necessary dependencies which is consistent across any computer. In ROB 102, we will be using Docker containers to make it easy to run the code you will develop without installing lots of dependencies. This also allows us to be sure that everyone is running code in the exact same environment.
We have provided a script to start a Docker container. We will be using the gcc Docker image which is based on Linux and includes everything we need to compile C++ code. Open a terminal in VSCode by selecting "Terminal" > "New Terminal". It should open a Bash terminal at the bottom of the screen, in the folder where your code is stored. In the terminal, type:
./docker_runA container called rob102-cpp-intro will start and the terminal will now be in open in the container. Your VSCode environment should look something like this:
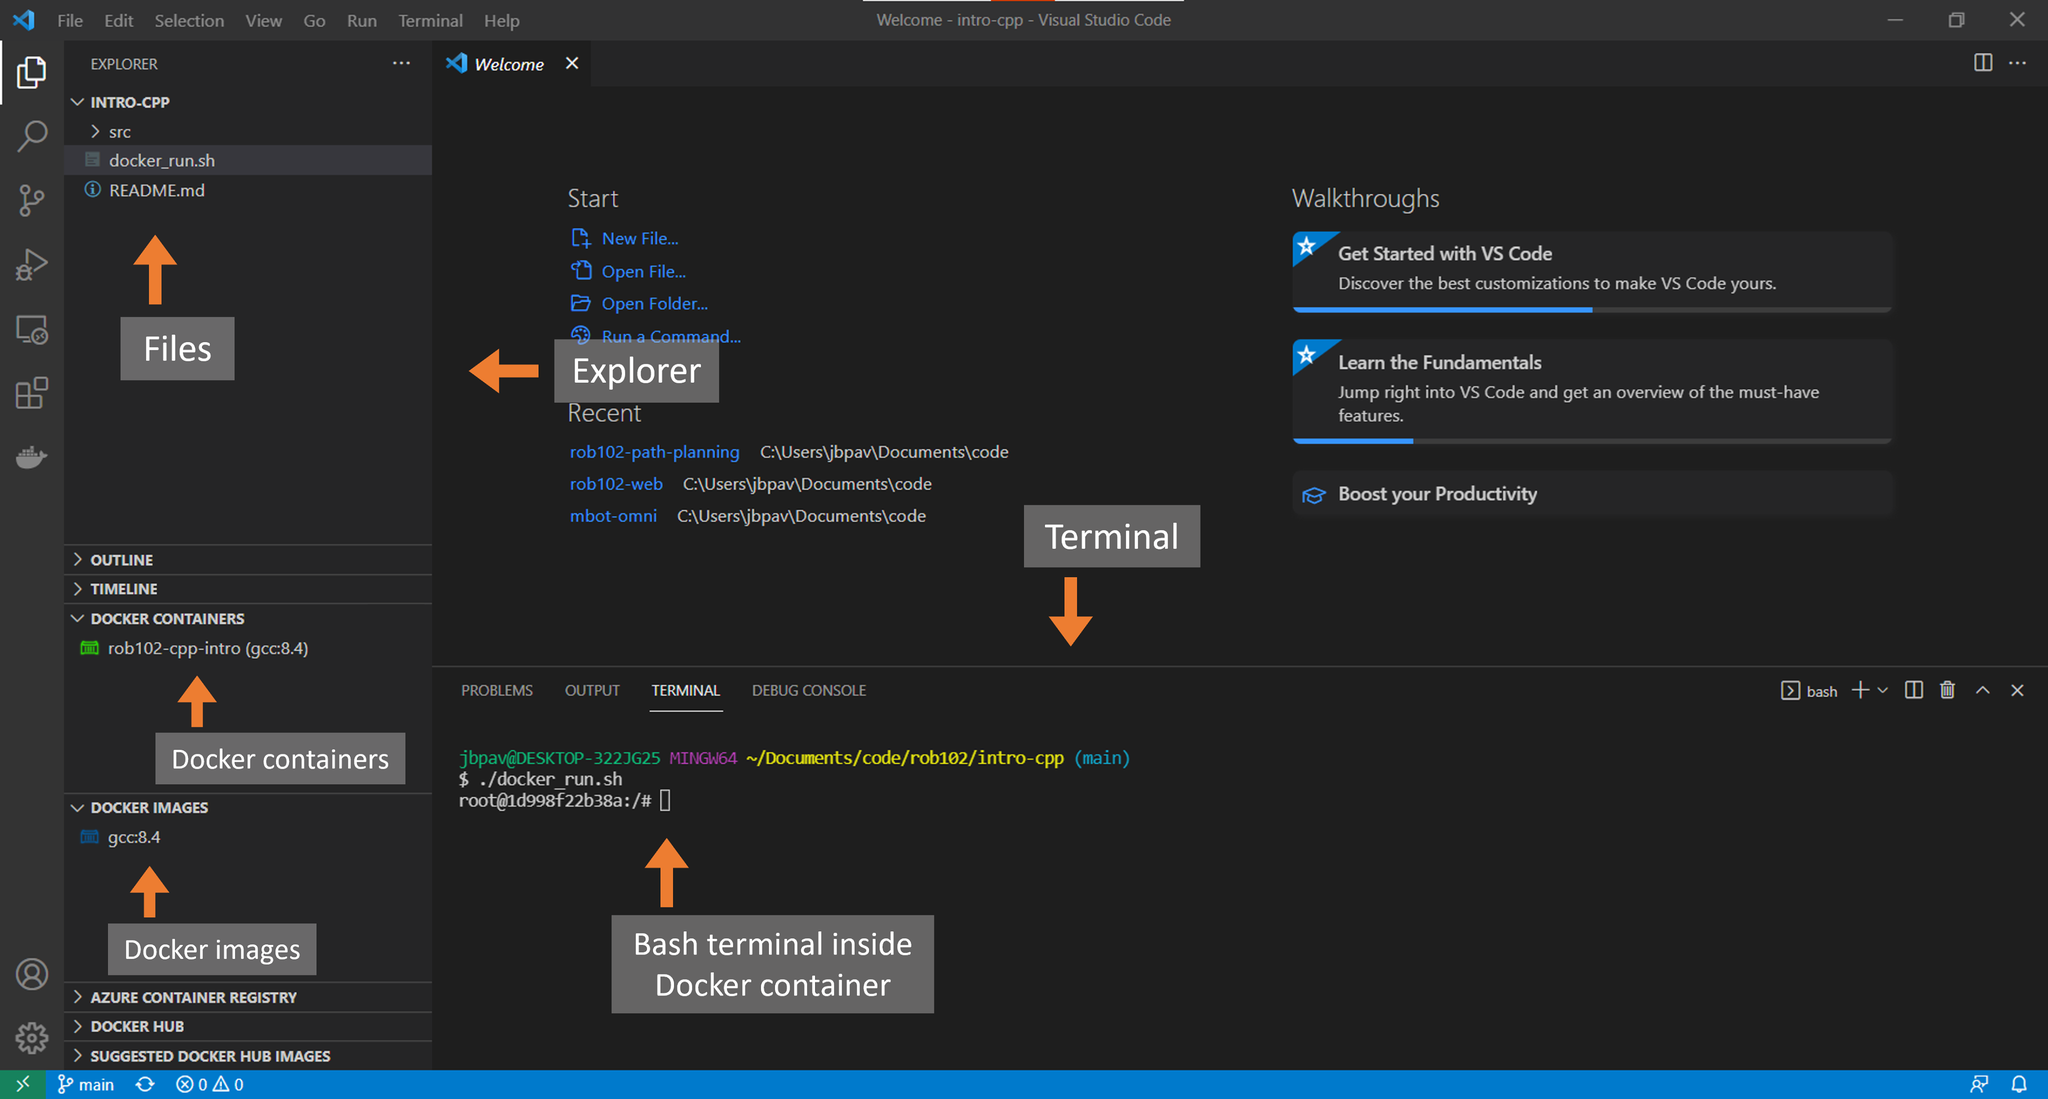
The directory src is mounted in the Docker container. Essentially, this means that the folder /code/src/ in the Docker container mirrors the folder intro-cpp/src/ on your computer. When you edit the files in VSCode, those changes will be reflected in the Docker container. This means you can write your code normally in VSCode, and compile and run it in the container, without having to restart it or copy over your code.
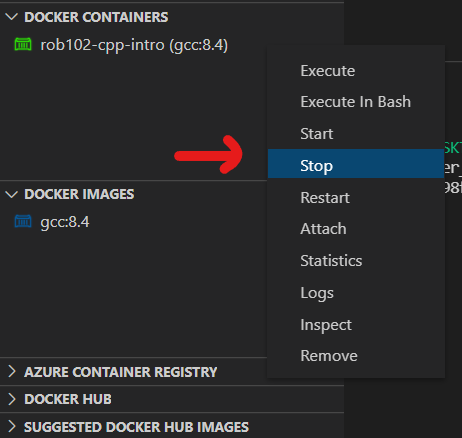
Stopping the Docker container
You can close the terminal within the container at anytime by typing exit in the terminal. Since the terminal is the only process running in the Docker container, this will stop and remove the container.
Another way to stop the container is using the Docker containers tab which comes with the Docker Explorer VSCode extension. Right-click on the running container and select "Stop":
Project Description
This project will introduce programming concepts in C++. The goal of the following activities is to prepare you to implement algorithms in C++. All the code will be compiled and executed in a Docker container. We will be using the command line to compile and run code for this assignment and for the rest of the projects.
This project is divided into 2 parts:
Hello World! (0 points)
In this part, you will get familiar with the structure of a C++ program and learn how to compile and execute code.
Before we run a program written in C++, we need to compile it using a C++ compiler. The compiler will turn the source code into machine code. It will create an executable which will execute the code in the main function. A compiler called g++ is already installed in the Docker container. To use it, first use the cd command (short for "change directory") to navigate to the folder where the code is stored. Remember that the src folder of the Git repository is mounted in the container. Try running these commands in the terminal:
cd /code/src/
ls
If the argument to cd starts with a slash, the argument refers to an absolute path. Otherwise, it refers to a path relative to the current working directory. The command ls is short for "list". It lists all the files and directories in the current directory (ls /my/dir/ would list everything in the directory /my/dir/). If you run the ls command in the /code/src/ directory, you should see all the same folders which are under intro-cpp/src/ in VSCode, one for each part.
- Hint: The command
cd /my/dir/changes the working directory to whatever path is passed as an argument, in this case,/my/dir/. If the path starts with a slash, it refers to an absolute path, otherwise, it is relative to the current working directory. The slash at the end of the path is optional. - Hint: The path passed to
cdmust be a valid path! Otherwise, you'll get an error. Try it now: In the terminal, type:
You'll see the error "No such file or directory." This is because you tried to change directories into a path that does not exist!cd not/a/real/path/ - Hint: The command
lsprints all the files and directories in the current directory. Passing it a directory as an argument will list what's in that directory instead.
Now, change directories to hello_world. If you're current directory is src, run:
cd hello_world/If you are not in the src folder, substitute the appropriate path. Next, compile the code in hello_world.cpp:
g++ hello_world.cpp -o hello_worldThe compiler should run and no errors should print out. Type ls. You should see a new executable file called hello_world in the folder. This is the executable created by the compiler. Run it with:
./hello_world-
Hint: To compile C++ code, use the following command:
Substituteg++ [my_program].cpp -o [executable_name][my_program].cppwith the name of the C++ file to compile, and[executable_name]with what the executable should be called. - Hint: You can run any executable file, like the ones generated by a compiler, like this:
Substitute./[executable_name][executable_name]with the name of the executable.
When you run your program, nothing happens! That's because we haven't written any code yet. In VSCode, navigate to the file src/q0_hello_world/hello_world.cpp. The main function looks like this:
int main(int argc, char** argv)
{
// TODO: Print out the message "Hello World! My name is __".
return 0;
}
Right now, the code just returns a zero, which means success. Let's print a message. On a new line under the comment and above the return statement, add this line:
std::cout << "Hello World!\n";Compile and run the program again, with the same commands as above. Now it should print out "Hello World!" Congratulations! You've written your first C++ code. Now, modify the message to print out "Hello World! My name is [YOUR NAME]." Replace "[YOUR NAME]" with your name.
- Hint: Every time you make a change to your code, it must be recompiled for the change to be reflected in the executable.
-
P0.0.1 (0 points): Complete the code in the file
hello_world.cppso that it prints the message "Hello World! My name is [YOUR NAME]."
Programming a Pocket Calculator (15 points)
During lecture, we will go through how to program a pocket calculator in C++. You should implement the calculator in the provided template file, which you can find in src/pocket_calc/pocket_calc.cpp. To compile and run it, we will do the same thing as in the Hello World exercise. In the terminal in the Docker container, do:
cd /code/src/hello_world/
g++ pocket_calc.cpp -o pocket_calc
./pocket_calc
Remember to recompile the code every time you make a change. We will implement this program in multiple steps. A list of each step to complete will be available on this page.
Features: Pocket Calculator
We will go through implementing these features to build up our pocket calculator together in class. The list of features below summarizes the steps we will cover in class (see the schedule for links to lecture content). Use them as a checklist before submitting your assignment. You are welcome to work on the assignment on your own time if you would like.
- P0.1.1 (2 points): Write statements that perform arithmetic operations for addition, subtraction, multiplication, and division for two integers stored in variables. The result of each operation must be a number.
- P0.1.2 (2 points): Create a function that can prompt a user to enter a real number and have the function return this number.
- P0.1.3 (3 points): Create a function with four parameters that performs a single arithmetic operation on two floating point operands based on the operator specified in a character variable. The result of the operation is returned in a parameter that is passed by reference. The program must quit if non arithmetic operation is specified.
- P0.1.4 (3 points): Develop an execution loop that performs an infinite number of subsequent arithmetic operations from user input, until the user specifies the operator 'q' for quit.
- P0.1.5 (3 points): Output the result accumulated over subsequently performed operations as an equation that conforms to infix notation.
- P0.1.6 (2 points): Enable the user to undo their last operation by specifying 'u' as the operator.
Advanced Extensions: Pocket Calculator
Advanced extensions are optional features which you may complete for up to 4 additional points in the course. They are due by the final grading deadline (December 10, 2021). They do not need to be completed by the deadline for this project. See the syllabus for details.
- Advanced Extension P0.1.i (1 extension point): Enable the user to clear the calculator by specifying 'c' as the operator.
- Advanced Extension P0.1.ii (2 extension points): Enable the user to store and load their current set of operations through a file named "resultcalc.txt" such that this equation can be used across multiple program executions.
Feature Summary
Hello World!
- P0.0.1 (0 points): Print the message "Hello World! My name is [YOUR NAME]."
Pocket Calculator
- P0.1.1 (2 points): Write statements that perform arithmetic operations for addition, subtraction, multiplication, and division for two integers stored in variables. The result of each operation must be a number.
- P0.1.2 (2 points): Create a function that can prompt a user to enter a real number and have the function return this number.
- P0.1.3 (3 points): Create a function with four parameters that performs a single arithmetic operation on two floating point operands based on the operator specified in a character variable. The result of the operation is returned in a parameter that is passed by reference. The program must quit if non arithmetic operation is specified.
- P0.1.4 (3 points): Develop an execution loop that performs an infinite number of subsequent arithmetic operations from user input, until the user specifies the operator 'q' for quit.
- P0.1.5 (3 points): Output the result accumulated over subsequently performed operations as an equation that conforms to infix notation.
- P0.1.6 (2 points): Enable the user to undo their last operation by specifying 'u' as the operator.
Advanced Extensions: Pocket Calculator
- Advanced Extension P0.1.i (1 extension point): Enable the user to clear the calculator by specifying 'c' as the operator.
- Advanced Extension P0.1.ii (2 extension points): Enable the user to store and load their current set of operations through a file named "resultcalc.txt" such that this equation can be used across multiple program executions.